
Kitchen Remodel Dumpster: One 10 Yard Did It All
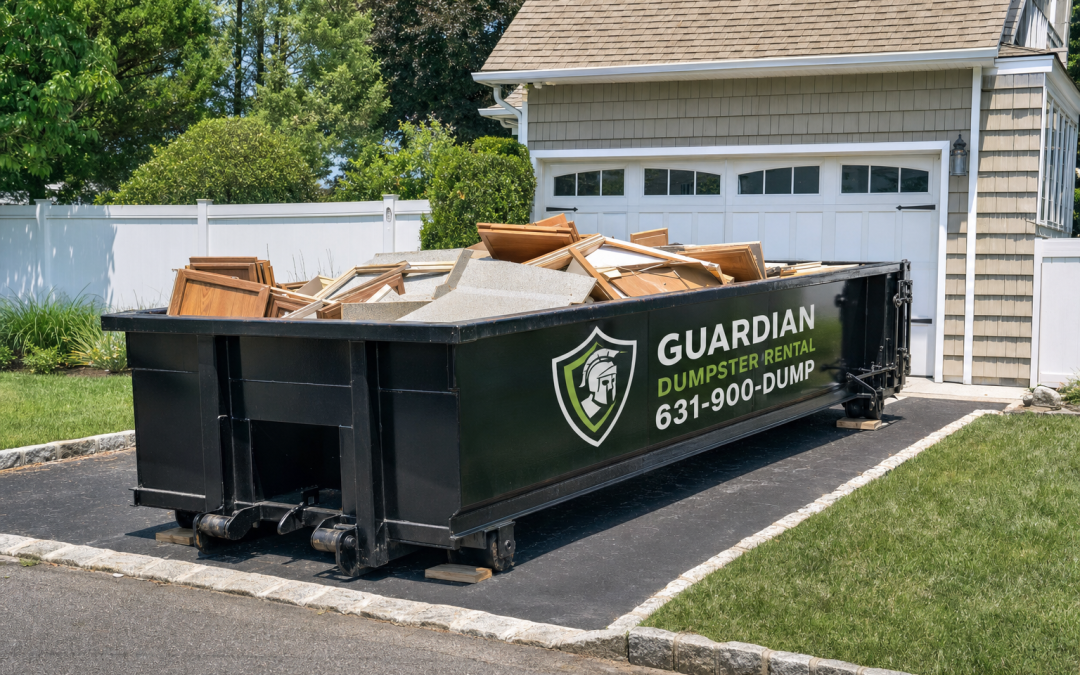
Can One 10 Yard Kitchen Remodel Dumpster Really Handle a Full Tear-Out?
Yes — a 10 yard kitchen remodel dumpster can handle a complete tear-out of a standard-sized kitchen in most New York homes. Cabinets, countertops, flooring, drywall, and old appliances typically fit in one container when the debris is broken down and loaded strategically, which is exactly what happened in the real project this case study follows.
Key takeaways
- A 10 yard dumpster typically holds the full tear-out from a standard kitchen remodel, including cabinets, countertops, and flooring.
- Breaking down cabinets and loading heavy materials like countertops flat on the bottom maximizes a small dumpster’s capacity.
- A 10 yard container’s compact footprint fits in most residential driveways, avoiding street permits in many areas.
- Renting one right-sized kitchen remodel dumpster usually costs less than multiple junk-hauling trips or bagster pickups.
- Watch weight limits closely when tossing dense debris like tile, granite, or concrete backer board — volume fills slower than tonnage.
If you’ve been pricing out a kitchen renovation, the dumpster question comes up fast. Contractors often push you toward a bigger box “just in case,” and homeowners understandably worry about running out of room mid-demo. But for the typical Long Island kitchen — roughly 100 to 200 square feet, with a standard run of cabinets and one set of appliances — a 10 yard container is usually the sweet spot. It holds about ten cubic yards of debris, roughly equivalent to four pickup truck loads, and it fits in a driveway without blocking the garage or hanging into the street.
The Real Project Behind This Case Study
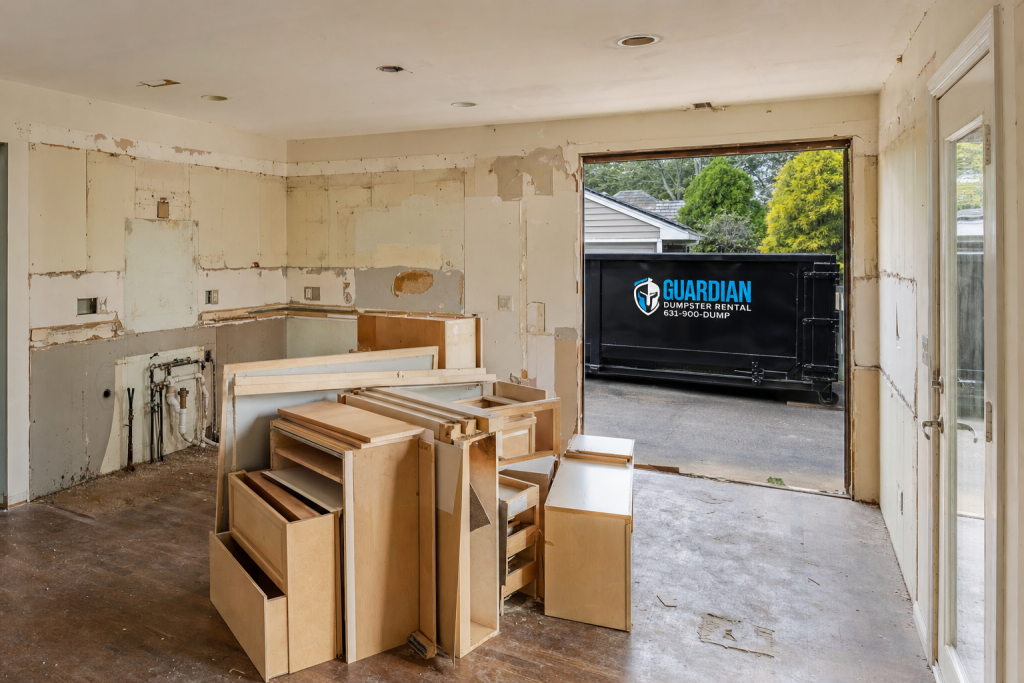
This post walks through an actual full kitchen gut on Long Island’s South Shore: a homeowner tearing a dated kitchen down to the studs and subfloor before the remodel crew came in. The scope included:
- Upper and lower cabinets along two walls, plus a small island
- Laminate countertops and a tile backsplash
- Two layers of old flooring — vinyl over the original tile
- Drywall and plaster removed from demo’d wall sections
- The old sink, faucet, and light fixtures
- An aging range and dishwasher (the fridge stayed)
Everything went into a single 10 yard dumpster rental in Babylon, delivered to a tight residential driveway and hauled away once — no swap-outs, no second container, no bags of leftover debris sitting at the curb.
Why This Case Study Is Worth Reading Before You Rent
Plenty of articles list dumpster sizes in the abstract. This one shows you what a real kitchen demo actually generates, load by load, so you can compare it to your own project. In the sections that follow, you’ll see:
- How to judge whether your kitchen matches the “standard” size that fits a 10 yard box
- A breakdown of exactly what went into the container and in what order
- Loading techniques that maximized space without exceeding the fill line
- How summer heat and pop-up storms in NY affected the demo schedule
- What a 10 yard container typically costs for this kind of job
The short version: if your kitchen is a standard size and you’re willing to break down cabinets and load with a little strategy, one 10 yard kitchen remodel dumpster is very likely all you need. The rest of this post shows you how to know for sure — and how to pull it off without overfilling.
Is a Kitchen Remodel Dumpster in the 10 Yard Size Big Enough for Your Project?
For most small-to-average kitchens — roughly 100 to 150 square feet — a 10 yard kitchen remodel dumpster is big enough to handle a full tear-out: cabinets, countertops, flooring, appliances, and drywall. If your kitchen is oversized, you’re removing walls, or the remodel bleeds into adjacent rooms, a 20 yard is the safer call.
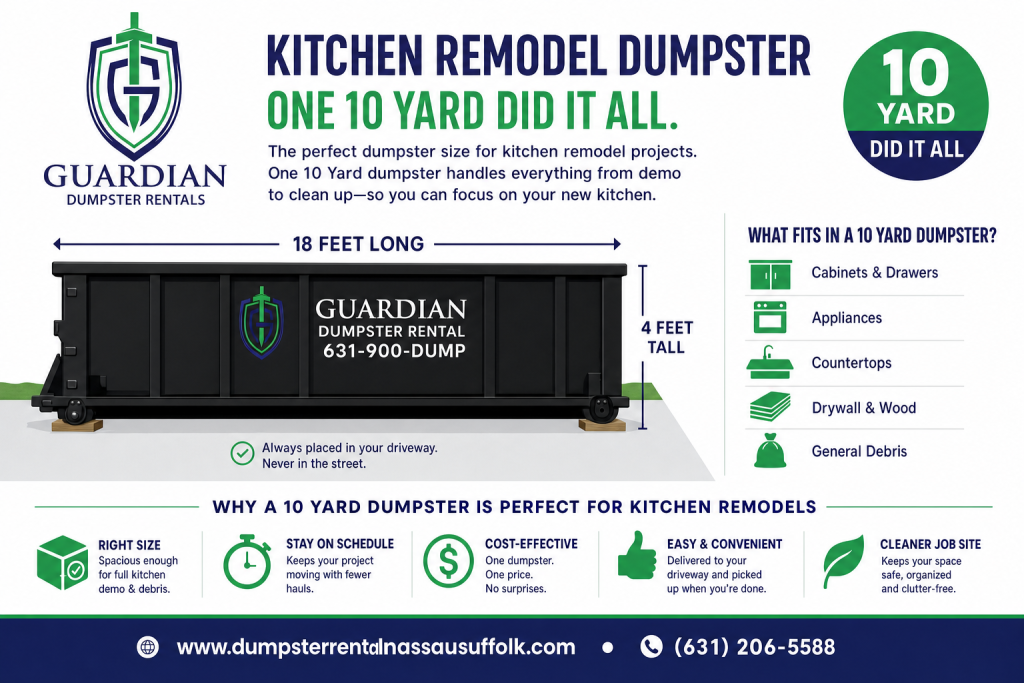
A 10 yard roll-off typically measures around 12 to 14 feet long, 7 to 8 feet wide, and 3.5 to 4 feet tall. That footprint is one of its biggest advantages for kitchen work: it fits in a standard driveway, sits low enough to toss debris over the side without a ramp, and leaves room for cars to squeeze past. Capacity works out to 10 cubic yards of debris — picture roughly three to four pickup truck loads — and most rentals in this size include a weight allowance in the range of one to two tons, though the exact number varies by company, so confirm before you book.
Kitchen Sizes and Tear-Out Scopes That Fit a 10 Yard
- Galley and small L-shaped kitchens: Full gut, including cabinets, counters, and flooring, usually fits with room to spare.
- Average kitchens (100–150 sq ft): A complete tear-out fits if you break down cabinets and load flat rather than tossing everything in whole.
- Cosmetic remodels of larger kitchens: If you’re keeping the layout and only replacing cabinets and counters — not opening walls or pulling subfloor — a 10 yard typically works even in a bigger kitchen.
Signals You Should Step Up to a 20 or 30 Yard
Kitchen debris is bulky more than it is heavy, so volume is usually what pushes people over the edge. Consider going bigger if any of these apply:
- Your kitchen is 200+ square feet with long cabinet runs or a large island.
- You’re removing walls — framing, extra drywall, and old insulation eat volume fast.
- Multiple flooring layers are coming up, especially old tile over mortar bed, which is heavy and can blow past a 10 yard weight allowance.
- The project scope is creeping into a dining room, mudroom, or adjacent bath. A combined kitchen-and-bath demo almost always calls for a 20 yard dumpster.
- You’d rather pay once than twice: a second haul on a 10 yard often costs more than renting a 20 yard from the start.
A 30 yard is rarely necessary for a kitchen alone — it makes sense when the kitchen is one piece of a whole-house renovation. If it’s genuinely just the kitchen, the 10 yard’s smaller footprint and lower price usually make it the smarter fit, provided you load it with a plan.
What Exactly Went Into the Dumpster? A Load-by-Load Breakdown
The 10 yard dumpster swallowed an entire kitchen’s worth of debris: upper and lower cabinets, laminate countertops, the old sink, tile backsplash, two layers of flooring, drywall scraps, and all the cardboard and packaging from the new materials. Altogether the debris filled roughly nine of the ten available cubic yards.
If you’re trying to gauge whether your own kitchen remodel dumpster needs to be bigger than 10 yards, the most useful thing is seeing how the volume actually breaks down category by category. Here’s what came out of this kitchen, load by load.
Cabinets: The Biggest Space Hog
- Upper cabinets — About 10 linear feet of wall cabinets, roughly 1.5 to 2 cubic yards once removed. Breaking them down into flat panels cut that volume nearly in half.
- Lower cabinets — Base cabinets are deeper and bulkier, taking up around 2 to 2.5 cubic yards intact. These also got knocked apart into sides, shelves, and doors before loading.
Countertops and Sink
- Laminate countertops — Two runs of counter plus a small peninsula section, about 1 cubic yard total. Laminate is light, so weight was never a concern here.
- Old sink and faucet — A double-basin stainless sink with the faucet still attached. Under half a cubic yard, and it tucked neatly into a gap between cabinet panels.
Backsplash and Flooring
- Tile backsplash — Chipped-off ceramic tile and thinset debris, bagged as it came down. Roughly half a cubic yard, but noticeably heavy for its size.
- Old flooring — This kitchen had vinyl sheet flooring glued over an older layer of tile. Both layers plus the underlayment added up to about 1.5 cubic yards, and the tile layer contributed a real share of the total weight.
Drywall and Wall Debris
- Drywall scraps — Sections cut out for new plumbing and electrical runs, plus damaged areas behind the old cabinets. About 1 cubic yard of broken sheets and cutoffs.
Packaging From the New Kitchen
- Cardboard, foam, and shrink wrap — People forget this one. New cabinets, appliances, and flooring arrive buried in packaging, and it added up to a surprising 1 to 1.5 cubic yards even after the boxes were flattened.
The Running Total
Add it all up and you land at roughly 8.5 to 9.5 cubic yards — a genuinely full container, but never over the rim. Two things made that possible: breaking down the cabinets instead of tossing them whole, and flattening every box. If this kitchen had granite countertops or plaster walls instead of drywall, the weight math would have changed, but the volume would have been similar. For a typical mid-size kitchen tear-out, this breakdown is a realistic preview of what your own debris pile will look like.
How Did They Load the Dumpster to Fit Everything Without Overfilling?
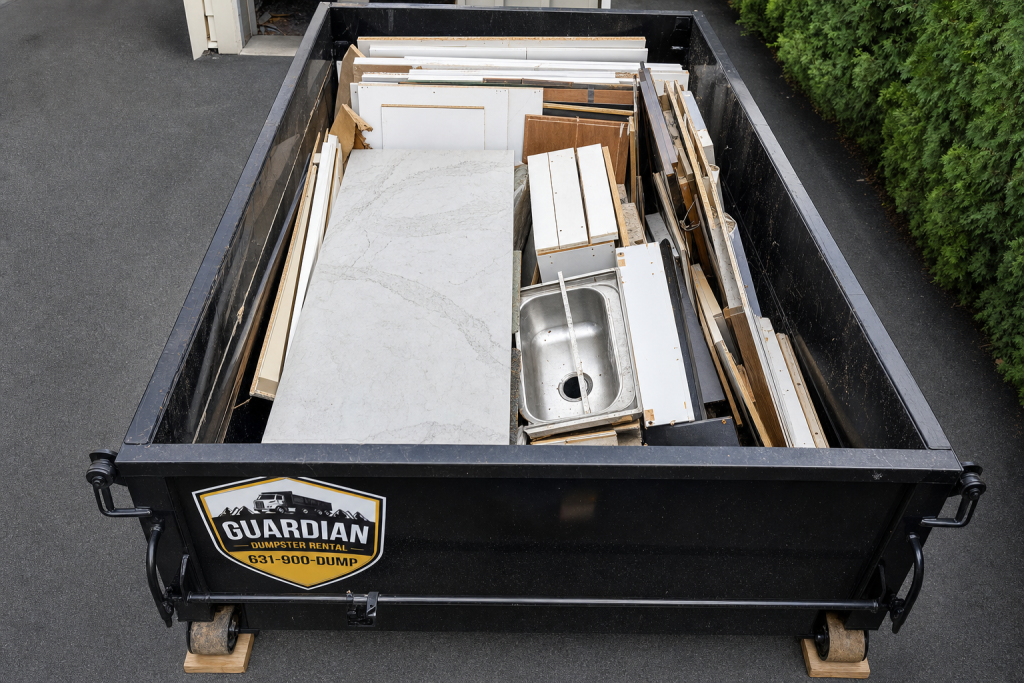
The load fit because nothing went in whole. Cabinets were broken down flat, countertops and sheet goods formed a dense base layer, smaller debris was nested into gaps as the pile grew, and the crew stopped loading once material reached the rim — keeping everything level and legal for hauling.
A 10 yard container has plenty of volume for a kitchen tear-out on paper, but that volume disappears fast if you toss debris in randomly. Whole cabinet boxes are the biggest culprit — each one is mostly trapped air. The loading strategy on this project treated the dumpster like a puzzle, and it made the difference between one haul and two.
Step 1: Break Everything Down Flat
Before anything went in the container, the crew knocked cabinets apart with a hammer and pry bar. Backs, sides, shelves, and face frames were separated into flat panels and stacked like lumber. Doors and drawer fronts were pulled and piled separately. What would have been a dumpster-filling stack of bulky boxes became a compact layer of flat material.
Step 2: Heavy, Flat Material Goes on the Bottom
Countertop sections, plywood, and any sheet goods were laid flat across the floor of the dumpster first. This does two things:
- Creates a stable base so nothing shifts or settles unevenly as more weight is added
- Keeps the heaviest debris low, which makes the container safer to lift and transport
Flooring tear-out and drywall scraps went in next, layered flat rather than tossed in a heap.
Step 3: Nest Small Debris Into the Gaps
No matter how carefully you stack, voids form between layers. The crew filled those gaps continuously with trim pieces, tile fragments, cabinet hardware, backsplash chunks, and bagged small debris. Filling voids as you go — rather than at the end — is what lets a kitchen remodel dumpster swallow more than its size suggests. A helpful habit: after every few armloads, have someone step back and point out air pockets before covering them over.
Step 4: Stay Level With the Rim
The final rule was non-negotiable: nothing above the fill line. Haulers can refuse pickup or charge extra when debris mounds over the top, because loads must be tarped and road-safe. The crew kept the surface level as they loaded, and when the last layer approached the rim, they walked the perimeter and pressed material down by hand to settle it evenly.
Quick Loading Checklist for Homeowners
- Disassemble cabinets before demo day so loading isn’t rushed
- Stage debris in sorted piles: flat/heavy, medium, and small filler
- Load in layers — never toss and hope
- Fill voids as they appear, not after the fact
- Stop at the rim, even if a few items remain (curbside bulk pickup can handle stragglers)
Loading with intention took maybe an extra hour of effort. Compared to the cost and delay of a second container, it was easily the best hour spent on the whole demo.
How Do Summer Heat and Storms Aff ect a Kitchen Demo Dumpster in NY?
Summer weather in New York affects a kitchen demo dumpster in two main ways: afternoon thunderstorms can soak debris and add water weight, and heat slows down the demo crew. The fix is simple — schedule delivery for the morning, keep the load tarped between work sessions, and do the heavy tear-out early in the day.
Why Rain Is the Bigger Problem
Most homeowners worry about working in the heat, but rain is what actually costs money. Dumpster rentals are priced with a weight allowance, and kitchen debris is like a sponge. Drywall, particleboard cabinets, and old subfloor all absorb water readily. A pop-up thunderstorm dumping rain into an open, half-full dumpster can push a load that was comfortably under the limit toward an overage charge — without a single extra item being tossed in.
- Drywall soaks up water and holds it, becoming noticeably heavier when wet.
- Particleboard and MDF cabinets swell and absorb moisture quickly.
- Old flooring and underlayment can trap standing water in layers.
The solution costs almost nothing: a heavy-duty tarp and a few bungee cords or scrap lumber to hold it down. Cover the container at the end of each work session and any time the sky looks threatening. If a storm has already soaked the load, let it drain and dry for a day before pickup if your rental window allows.
Timing Delivery Around Afternoon Storms
New York summers follow a familiar pattern — clear mornings, then heat builds and thunderstorms roll through in the late afternoon. Work with that pattern instead of against it:
- Request morning delivery. The container arrives on dry ground, and the driver isn’t navigating a slick driveway.
- Check the forecast before demo days. If storms are likely after 3 p.m., plan to have the messiest debris loaded and tarped by early afternoon.
- Protect the driveway. Soft, rain-soaked asphalt is more prone to marks from the container’s rails, so plywood under the contact points is a smart precaution in hot weather.
Working the Demo in Heat and Humidity
A kitchen tear-out is physical work, and an un-air-conditioned demo zone in July gets brutal fast. A few adjustments keep the project moving:
- Start early. Handle cabinets, countertops, and flooring removal in the cooler morning hours; save lighter cleanup for the afternoon.
- Ventilate. Fans and open windows move dust out and keep air moving — demo dust plus humidity is miserable to breathe.
- Make fewer trips. Stage debris near the door and carry full loads to the dumpster rather than shuttling back and forth in the sun.
- Hydrate and pace yourself. Heat exhaustion ends a demo day faster than any tool failure.
Handled this way, summer is actually a fine season for a kitchen remodel dumpster rental — you just have to respect the forecast and keep that tarp handy.
How Much Does a 10 Yard Dumpster Cost for a Kitchen Remodel?
A 10 yard kitchen remodel dumpster in New York typically runs a few hundred dollars for a standard rental, with most quotes covering delivery, pickup, a set rental period, and a weight allowance of one to two tons. Your exact price depends on your location, how heavy your debris is, and how long you keep the container.
Because pricing varies quite a bit between upstate towns, Long Island, and the five boroughs, the smartest move is to get an itemized quote rather than relying on a single advertised number. Here’s what actually drives the total.
The Four Factors That Set Your Price
- Rental period. Most quotes include 7 to 14 days. A kitchen tear-out usually wraps in a weekend, so the standard window is rarely a problem — but ask about daily extension fees just in case your project stalls.
- Weight allowance. This is the big one for kitchens. Cabinets and drywall are light, but tile, mortar, and countertops add up fast. Overage fees are charged per ton beyond your included limit, so tell your provider upfront if you’re pulling up a tile floor or removing stone counters.
- Delivery location. Distance from the transfer station, local disposal rates, and whether you need a street placement permit (common in NYC and denser villages) all affect the bottom line. Check with your municipality before delivery day.
- Debris type. Standard construction debris is fine, but items like refrigerants, old paint, and adhesives may be restricted. The EPA’s guidance on household hazardous waste is a good checklist before you start tossing things in.
What This Customer’s Rental Looked Like
In this project, the homeowner booked a flat-rate 10 yard rental with the standard included weight, kept the dumpster within the rental window, and stayed under the tonnage limit — meaning the final bill matched the original quote with no surprises. That’s the outcome you’re aiming for, and it’s very achievable for a single-kitchen demo when you plan your load.
Choosing Between 10, 20, and 30 Yards
- 10 yard: Best for a kitchen-only tear-out — cabinets, counters, flooring, appliances, and drywall from one room. Lowest cost and fits in most driveways.
- 20 yard: Worth the step up if your remodel extends into an adjacent dining room, includes wall removal, or you’re clearing out a basement at the same time.
- 30 yard: Overkill for a kitchen alone. Reserve it for whole-home renovations or gut jobs spanning multiple rooms.
One last budget tip: separating recyclable materials like scrap metal and clean cardboard keeps weight down and disposal responsible. The EPA’s resources on construction and demolition materials explain which remodel debris can be diverted from the landfill — good for the environment and, often, for your final invoice.
Roughly 16-18 ft long x 7-8 ft wide
Typical 10 yard dumpster footprint
Often 1-2 tons included, varies by hauler
Common weight allowance
Typically 2-4 tons for a standard kitchen
Average kitchen tear-out debris
Usually 7-14 days, extensions available
Standard rental period
Kitchen Remodel Dumpster Size Comparison
| Dumpster Size | Typical Capacity | Best For | Driveway Fit |
|---|---|---|---|
| 10 Yard | About 3-4 pickup truck loads | Full kitchen tear-out: cabinets, counters, flooring | Excellent — compact footprint |
| 20 Yard | About 6 pickup truck loads | Kitchen remodel combined with whole-home cleanout | Good, needs more clearance |
| Bagster/Junk Hauling | Roughly 3 cubic yards per bag or load | Small partial projects only | Flexible but limited volume |
Illustrative Example: One 10 Yard Container, One Full Kitchen
Illustrative example
Consider a hypothetical homeowner gutting a mid-sized 1990s kitchen: upper and lower cabinets, laminate countertops, a tile backsplash, and vinyl flooring all needed to go. By unscrewing cabinet boxes into flat panels and laying the countertop sections on the dumpster floor first, the crew used the container’s volume efficiently. The tile and backer board were spread evenly across the load rather than piled in one corner, keeping the weight balanced and under the hauler’s limit. Everything from the demo fit in a single 10 yard dumpster with room to spare, and the driveway placement meant no street permit was needed. This composite scenario reflects how a typical full kitchen tear-out plays out when debris is loaded strategically.
Frequently asked questions
Is a 10 yard dumpster big enough for a full kitchen remodel?
For most standard kitchens, yes. A 10 yard dumpster holds roughly three pickup truck loads of debris, which typically covers cabinets, countertops, flooring, drywall, and old appliances from an average-sized kitchen. Break down cabinets flat, nest smaller pieces inside larger ones, and load heavy items like countertops first. Very large kitchens, or projects that include removing walls or subfloor, may push you toward a 20 yard container instead.
How much does a kitchen remodel dumpster rental usually cost?
Pricing varies by region, rental length, and local landfill fees, but a 10 yard dumpster is typically the most affordable roll-off size a company offers. Most rentals include delivery, pickup, a set rental period, and a weight allowance in one flat rate. Ask upfront about overage charges per ton, extra-day fees, and any prohibited items, since those extras are where the final bill can climb past the quoted price.
How long can I keep the dumpster during my kitchen tear-out?
Most companies include a standard rental window, commonly around 7 to 14 days, which is plenty for a kitchen demo that usually takes one to three days of actual tear-out. If your contractor’s schedule slips, most providers offer paid extensions by the day. To save money, don’t schedule delivery until you’re actually ready to start demolition, so you’re not paying for days the dumpster sits empty in your driveway.
Can I put granite or quartz countertops in a 10 yard dumpster?
Generally yes, but weight is the concern, not space. Stone countertops are extremely heavy, and dumpsters come with weight limits, often measured in tons. A full set of granite slabs plus other demo debris can approach or exceed a 10 yard limit, triggering overage fees. Tell your rental company you’re disposing of stone so they can advise on limits, and load the slabs flat on the bottom to keep the container stable.
What can’t go in a dumpster during a kitchen remodel?
Common prohibited items include refrigerators and freezers with refrigerant still in them, paint, solvents, adhesives, batteries, and anything flammable or hazardous. Some haulers also restrict or charge extra for appliances, electronics, and tires. Rules vary by company and local landfill regulations, so confirm before demo day. If your old fridge is on the list, many appliance retailers, scrap haulers, or utility programs will take it separately, sometimes for free.
Where should the dumpster go if my driveway is short or sloped?
A 10 yard dumpster’s compact footprint fits most residential driveways, which is a big reason it works well for kitchen projects. Put down plywood or boards under the wheels and rails to protect concrete or asphalt. If the driveway won’t work, street placement is often possible but usually requires a permit from your city. Steep slopes are a problem, so discuss placement with the rental company before delivery day.
What’s the biggest mistake people make loading a kitchen demo dumpster?
Throwing cabinets in whole. Intact cabinets are mostly air, and a few uppers and lowers tossed in fully assembled can eat half the container. Knock cabinets apart with a hammer or unscrew them into flat panels, stack sheet goods vertically along the sides, and fill gaps with small debris. Loading heavy items first and keeping everything below the fill line also prevents the driver from refusing an overfilled pickup.
Should I rent a dumpster myself or let my contractor handle debris?
Compare the numbers. Contractors often build a markup into their disposal line item, so renting your own dumpster can save money, especially if you’re doing the tear-out yourself. However, if the contractor supplies the dumpster, they own the weight limits, prohibited-item issues, and scheduling headaches. If you rent it yourself, get the rules in writing and make sure the contractor’s crew knows the weight allowance before they start loading.
Do I need to be home when the dumpster is delivered or picked up?
Usually not, as long as you’ve clearly communicated placement. Mark the spot with cones, chalk, or a note, and make sure the driveway is clear of vehicles with enough overhead clearance for the truck to tilt the container. For pickup, nothing can stick out above the top rails and lids or doors must close. Being unreachable when a driver hits a problem is a common cause of failed-delivery or trip fees.
What happens if my kitchen debris goes over the dumpster’s weight limit?
The hauler weighs the container at the landfill or transfer station, and anything over your included tonnage is billed per ton on your final invoice. Kitchens hit limits mainly through stone countertops, tile, and plaster. If you suspect you’ll be close, ask about the per-ton overage rate ahead of time, keep the heaviest materials to a minimum, or consider hauling small heavy loads like tile to the landfill yourself.
Related local pages
- Dumpster Rental Babylon New York: Sizing, Placement, And Same-Week Delivery For South Shore Projects
- Dumpster Rental Bay Shore New York — 10, 20, And 30 Yard Roll-Offs Sized For South Shore Homes And Job Sites
Planning your own kitchen tear-out? Call us today to reserve a 10, 20, or 30 yard dumpster and get straight answers on which size fits your project. Get in touch.
Last updated: August 12, 2026
Recent Comments